|
Читайте также: |
9*4 Electrical system

4.2 If the charger doesn't have ammeter built in, connect one in series as shown. DO NOT connect the ammeter between the battery terminals or it will be ruined
Reconnect the leads, connecting the negative (-ve) terminal last, and apply a thin coat of petroleum jelly to the connections to slow further corrosion.
8 The battery case should be kept clean to prevent current leakage, which can discharge the battery over a period of time (especially when it sits unused). Wash the outside of the case with a solution of baking soda and water. Rinse the battery thoroughly, then dry it.
9 Look for cracks in the case and renew the battery if any are found. If acic has been spilled on the frame or battery box, neutralise It with a baking soda and water solution, dry it thoroughly, then touch up any damaged paint.
10 If the motorcycle sits unused for long periods of time, disconnect the cables from the battery terminals, negative (-ve) terminal first. Refer to Section 4 and charge the battery once every month to six weeks.
11 The condition of the battery can be assessed by measuring the voltage present at the battery terminals. Connect the voltmeter positive (+ve) probe to the battery positive (+ve) terminal, and the negative (-ve) probe to the battery negative (-ve) terminal. When fully charged there should be more than 12.8 volts present. If the voltage falls to 12.3 volts the battery must be removed, disconnecting the negative (-ve) terminal first, and recharged as described below in Section 4.
4 Battery - charging |§.
Caution: Be extremely careful when handling or working around the battery. The electrolyte is very caustic and an explosive gas (hydrogen) is given off when the battery is charging.

|
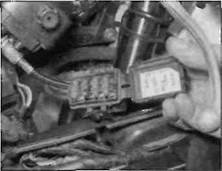
| 5.2a Fusebox - J and К models |
1 Remove the battery (see Section 3). Connect the charger to the battery, making sure that the positive (+ve) lead on the charger is connected to the positive (+ve) terminal on the battery, and the negative (-ve) lead is connected to the negative (-ve) terminal.
2 Honda recommend that the battery is charged at a maximum rate of 0.9 amps (J and К models) or 0.7 amps (L, N and R models) for 5 to 10 hours. Exceeding this figure can cause the battery to overheat, buckling the plates and rendering it useless. Few owners will have access to an expensive current controlled charger, so if a normal domestic charger is used check that after a possible initial peak, the charge rate falls to a safe level (see illustration). If the battery becomes hot during charging stop. Further charging will cause damage. Note: In emergencies the battery can be charged at a higher rate of around 3.0 amps for a period of 1 hour. However, this is not recommended and the low amp charge is by far the safer method of charging the battery.
3 If the recharged battery discharges rapidly if left disconnected it is likely that an internal short caused by physical damage or sulphation has occurred. A new battery will be required. A sound item will tend to lose its charge at about 1 % per day.
4 Install the battery (see Section 3).
5 If the motorcycle sits unused for long periods of time, charge the battery once every month to six weeks and leave it disconnected.
5 Fuses - check and renewal |fe>
|
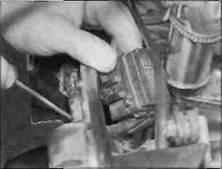
| 5.2b On L, N and R models, lift the box off its clip... |
1 The electrical system is protected by fuses of different ratings. All except the main fuse are housed in the fusebox, which Is located in the left-hand side of the fairing. The main fuse is integral with the starter relay, which is under the seat cowling on the right-hand side of the bike on J and К models, and on the left on L, N and R models.
2 To access the fuses in the fusebox, unclip the fusebox lid (see illustration). On J and К models, remove the left-hand air duct for access (see Chapter 8). On L, N and R models, access is quite restricted - it is easier to lift the fusebox off its clip and displace it upwards (see illustrations). To access the main fuse, remove the seat cowling (see Chapter 8) and disconnect the starter relay wiring connector (see illustrations).
|

|
5.2c... for best access to the fuses

Дата добавления: 2015-10-29; просмотров: 131 | Нарушение авторских прав
| <== предыдущая страница | | | следующая страница ==> |
| D ... and remove the cowling | | | B A blown fuse can be identified by a break in its element |