Читайте также:
|
5.2b... and pull the hose out of the clip
Every 4000 miles (6000 km) or 6 months 1.9
|
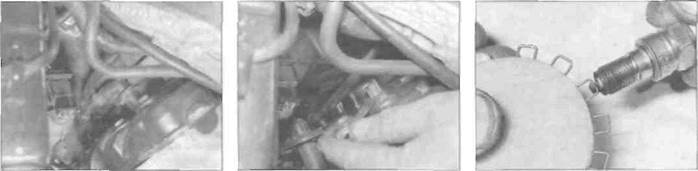
5.4a Remove the spark plug cap...
5.4b... then unscrew the spark plug
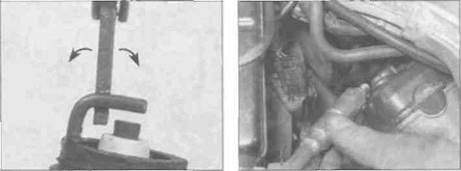
5.8a Using a wire type gauge to measure the spark plug electrode gap
on each plug lead and mark them accordingly if not. Pull the spark plug cap off each spark plug (see illustration). Clean the area around the base of the plugs to prevent any dirt falling into the engine. Using either the plug removing tool supplied in the bike's toolkit or a deep socket type wrench, unscrew the plugs from the cylinder head (see illustration). Lay each plug out In relation to its cylinder; if any plug shows up a problem it will then be easy to identify the troublesome cylinder.
5 Inspect the electrodes for wear. Both the centre and side electrodes should have square edges and the side electrodes should be of uniform thickness. Look for excessive deposits and evidence of a cracked or chipped insulator around the centre electrode. Compare your spark plugs to the colour spark plug reading chart at the end of this manual. Check the threads, the washer and the ceramic insulator body for cracks and other damage.
6 If the electrodes are not excessively worn, and if the deposits can be easily removed with a wire brush, the plugs can be re-gapped and re-used (if no cracks or chips are visible in the insulator). If in doubt concerning the condition of the plugs, renew them, as the expense is minimal.
7 Cleaning spark plugs by sandblasting is permitted, provided you clean the plugs with a high flash-point solvent afterwards.
8 Before installing the plugs, make sure they
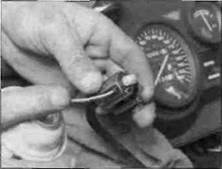
are the correct type and heat range and check the gap between the electrodes (see illustrations). Compare the gap to that specified and adjust as necessary. If the gap must be adjusted, bend the side electrodes only and be very careful not to chip or crack the insulator nose (see illustration). Make sure the washer is in place before installing each plug. 9 Since the cylinder head is made of aluminium, which is soft and easily damaged, thread the plugs into the heads turning the tool by hand (see illustration). Once the plugs are finger-tight, the job can be finished with a spanner on the tool supplied or a socket drive (see illustration 5.4b). Tighten the plugs an additional 1/4 to 1/2 turn or as directed on the manufacturer's packaging. Do not over-tighten them.
| PTTWJl As the plugs are quite лЫШЯЯ recessed, slip a short length Hint |
of hose over the end of the plug to use as a tool to thread it into place. The hose will grip the plug well enough to turn it, but will start to slip if the plug begins to cross-thread in the hole - this will prevent damaged threads.
10 Reconnect the spark plug caps, making sure they are securely connected to the correct cylinder (see illustration 5.4a). Install all other components previously removed.
| Stripped plug threads in the | ||
| hint | cylinder head can be repaired with a thread insert - see | |
| 'Tools and Workshop Tips in the Reference section. |
Stand, lever pivots and cables - lubrication
Pivot points
1 Since the controls, cables and various other components of a motorcycle are exposed to the elements, they should be lubricated periodically to ensjre safe and trouble-free operation.
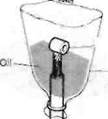
2 The footrests, clutch and brake levers, brake pedal, gearchange lever linkage and sidestand pivots should be lubricated frequently. In order for the lubricant to be applied where it will do the most good, the component should be disassembled. However, if chain and cable lubricant is being used, it can be applied to the pivot joint gaps and will usually work its way into the areas where friction occurs. If motor oil or light grease Is being used, apply it sparingly as it may attract dirt (which could cause the controls to bind or wear at an accelerated rate). Note: One of the best lubricants for the
|
| Л*"" | |
| ypt |
5.8b Using a feeler gauge to measure the 5.8c Adjust the electrode gap by bending
spark plug electrode gap the side electrode only
5.9 Thread the plug in as far as possible turning the tool by hand
1.Ю Every 4000 miles (6000 km) or 6 months
| I --- Nipple |
Дата добавления: 2015-10-29; просмотров: 179 | Нарушение авторских прав
| <== предыдущая страница | | | следующая страница ==> |
| Slacken the lockring (A) and turn the adjuster (B) in or out as required | | | B Lubricating a cable with a makeshift funnel and motor oil |