|
Читайте также: |
(see illustration). Due to the increased friction material thickness of new pads, it may be necessary to remove the master cylinder reservoir cover and diaphragm and remove some fluid.
8 Where removed, fit the shims onto the back of the pads, making sure the arrow points in the direction of normal disc rotation. Smear the backs of the pads and the shank of the pad pin with copper-based grease, making sure that none gets on the front or sides of the pads.
9 Installation of the pads is tie reverse of removal. Make sure the pad spring is correctly positioned in the caliper and the pad plate is clipped to the caliper bracket (see illustration). Insert the pads into the caliper so that the friction material faces the disc, making sure they locate correctly against the pad spring and engage the pad plate (see illustration), then push up on the pads to align the holes and slide the pad retaining pin through (see illustration 6.1b). Make sure the pin passes through the hole in each pad. Tighten the pad retaining pin linger tight.
10 Swing the caliper down and tighten the mounting bolt to the torque setting specified at the beginning of the Chapter (see illustration). Tighten the pad retaining pin to the specified torque, then install the pad pin plug and tighten that (see illustration 6.1a).
11 Top up the master cylinder reservoir if
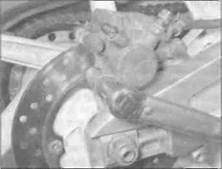
6.9a Make sure the pad spring (A) and pad plate (B) are correctly located...
necessary (see Daily (pre-ride) checks), and refit the reservoir cover and diaphragm. 12 Operate the brake pedal several times to bring the pads into contact with the disc. Check the operation of the brake before riding the motorcycle.
7 Rear brake caliper - removal, |^
overhaul and installation ^»
Warning: If a caliper indicates At the need for an overhaul (usually f J \ due to leaking fluid or sticky ^™^ operation), all old brake fluid should be flushed from the system. Also, the dust created by the brake system may contain asbestos, which is harmful to your health. Never blow it out with compressed air and don't inhale any of it. An approved filtering mask should be worn when working on the brakes. Do not, under any circumstances, use petroleum-based solvents to clean brake parts. Use clean brake fluid, brake cleaner or denatured alcohol only.
Removal
1 If the caliper is being overhauled, remove the brake pads (see Section 6). If the caliper is just being removed, the pads can be left in place.
2 If the caliper is just being displaced and not completely removed or overhauled, do not disconnect the brake hose. If the caliper is being overhauled, note the alignment of the
Дата добавления: 2015-10-29; просмотров: 150 | Нарушение авторских прав
| <== предыдущая страница | | | следующая страница ==> |
| Front brake master cylinder components | | | Tighten the mounting bolt to the specified torque |