|
Читайте также: |
B... and remove the seat
A Insert the key and turn the lock...
|

|

|
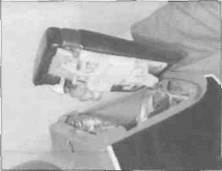
B. -. and remove the seat
A Insert the key and turn the lock to raise the seat up
2.3b Remove the toolkit...
2 Seats - ^
removal and installation |s
Removal
1 To remove the rider's seat, lift up the flap at the front of the seat and unscrew the bolt {see illustration). Remove the seat, noting how the tabs at the back locate (see illustration).
2 To remove the passenger seat on J and К models. Insert the Ignition key into the seat lock located behind the rider's seat, and turn it clockwise to unlock the passenger's seat {see illustration). Remove the passenger's seat (see illustration).
3 To open the passenger seat on L, N and R
models, insert the ignition key into the seat
lock located behind the seat, then turn it
clockwise and raise the seat (see
illustration). To remove the seat, release the
strap and remove the toolkit, then unscrew
the two bolts securing the bracket assembly
and remove the seat, noting how the hinge
spring locates (see illustrations).
Installation
4 Installation is the reverse of removal. Make
sure the tabs at the rear of the rider's seat,
and the tab at the rear of the passenger seat
on J and К models locate correctly into the
brackets (see illustrations 2.1b and 2.2b).
On L, N and R models, make sure the
hinge spring end locates correctly (see illustration 2.3c). Push down on the passenger seat to engage the latch.
3 Seat cowling - §b
removal and installation Ц
Removal
1 Remove the seats (see Section 2).
2 On J and К models, remove the two bolts securing each side of the seat cowling, the bolt securing the central retaining bracket. and the screw on each underside at the back (see illustrations). Carefully pull each side of


|

|

|

|
2.3c... then unscrew the two bolts (A)
And remove the seat, noting how the
Spring end (B) locates
A Remove the two bolts (A) on each side, the central bolt (B)...
Bodywork 8»3

|
C Pull each front side away to release the lugs from the grommets (arrowed)...
Дата добавления: 2015-10-29; просмотров: 130 | Нарушение авторских прав
| <== предыдущая страница | | | следующая страница ==> |
| General information | | | D ... and remove the cowling |