Читайте также:
|
into the spark plug hole, then screw the
gauge into the adapter
Fault Finding Equipment ref-37
the ignition switch ON; open the throttle fully and crank the engine over on the starter motor for a couple of revolutions until the gauge reading stabilises. If the starter will not operate with the kill switch OFF, turn the ignition switch OFF and refer to the next paragraph. 5 Install the spark plugs back into their suppressor caps and arrange the plug electrodes so that their metal bodies are earthed (grounded) against the cylinder head; this is essential to prevent carnage to the ignition system as the engine is spun over (see illustration 2). Position the plugs well away from the plug holes otherwise there is a risk of atomised fuel escaping from the combustion chambers and igniting. As a safety precaution, cover the top of the valve cover with rag. Now turn the ignition switch ON and kill switch ON, open tie throttle fully and crank the engine over on the starter motor for a couple of revolutions until the gauge reading stabilises.
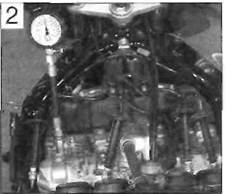
All spark plugs must be earthed (grounded) against the cylinder head
6 After one or two revolutions the pressure should build up to a maximum figure and then stabilise. Take a note of this reading and on multi-cylinder engines repeat the test on the remaining cylinders.
7 The correct pressures are given in Chapter 2 Specifications. If the results fall within the specified range and on multi-cylinder engines all are relatively equal, the engine is in good condition. If there is a marked difference between the readings, or if the readings are lower than specified, inspection of the top-end components will be required.
8 Low compression pressure may be due to worn cylinder bores, pistons or rings, failure of the cylinder head gasket, worn valve seals, or poor valve seating.
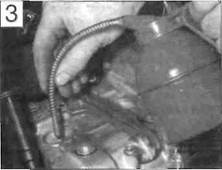
9 To distinguish between cylinder/piston wear and valve leakage, pour a small quantity of oil into the bore to temporarily seal the piston rings, then repeat the compression tests (see illustration 3). If the readings show a noticeable increase in pressure this confirms that the cylinder bore, piston, or rings are worn. If, however, no change is indicated, the cylinder head gasket or valves should be examined.
Дата добавления: 2015-10-29; просмотров: 174 | Нарушение авторских прав
| <== предыдущая страница | | | следующая страница ==> |
| Poor running at low speed | | | Float-type hydrometer for measuring battery specific gravity |