Читайте также:
|
4»6 Fuel and exhaust systems
|
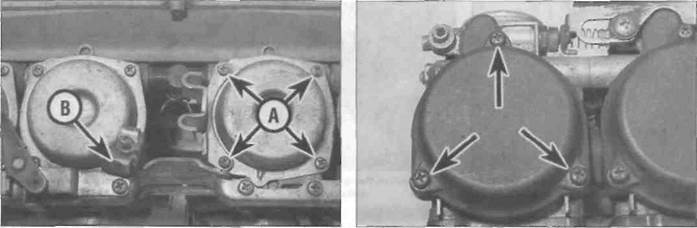
A Top cover screws (A) - J and К models. Remove the choke cable bracket (B) to access No. 3 carburettor
B Top cover screws (arrowed) - L, N and R models
|
| I |
8 Carburettors - disassembly, cleaning and inspection
| A |
Warning: Refer to the precautions given in Section 1 before starting work.
Disassembly
1 Remove the carburettors from the machine as described in the previous Section. Note: Do not separate the carburettors unless
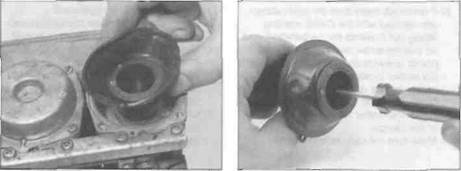
Peel the diaphragm off the carburettor
And withdraw the diaphragm and piston
Assembly
absolutely necessary; each carburettor can be dismantled sufficiently for all normal cleaning and adjustments while in place on the mounting brackets. Dismantle the carburettors separately to avoid interchanging parts.
2 On J and К models, if required, remove the air duct assembly from the carburettors (see Section 9, Step 3), but note that this Is not necessary for carburettor disassembly and cleaning, unless they are being separated.
3 Unscrew and remove the top cover retaining screws (see illustrations). Lift off the cover and remove the spring from inside
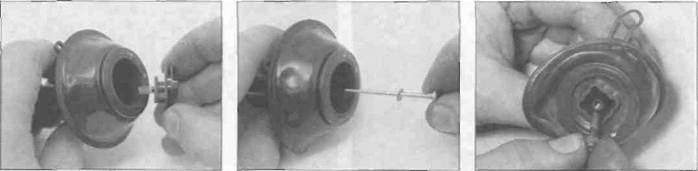
8.5a Push down on the retainer and turn it to release it...
the piston (see illustration 10.14a). On J and К models, when working on No. 3 carburettor, it is necessary to remove the choke cable holder to access the screws.
4 Carefully peel the diaphragm away from its
sealing groove in the carburettor and
withdraw the diaphragm and piston assembly
(see illustration). Note how the tab on the
diaphragm fits in the recess In the carburettor
body.
Caution: Do not use a sharp instrument to displace the diaphragm as it is easily damaged.
5 On J and К models, if required, gently push down on the jet needle retainer using a Phillips screwdriver and rotate it until its tab is released from the protrusions inside the piston, then remove the retainer and spring (see illustrations). Push the needle up from the bottom of the piston and withdraw It from the top (see illustration). Take care not to lose the washer that fits between the head of the needle and the piston.
6 On l_ N and R modes, if required, thread a 4 mm screw into the top of the needle holder (one of the top cover retaining screws is ideal), then grasp the screw head using a pair of pliers and carefully draw the holder out of the piston (see illustrations). Note the spring that
|
Дата добавления: 2015-10-29; просмотров: 135 | Нарушение авторских прав
| <== предыдущая страница | | | следующая страница ==> |
| Release the clip and detach the fuel hose | | | B ... then remove the retainer ... |