|
Читайте также: |
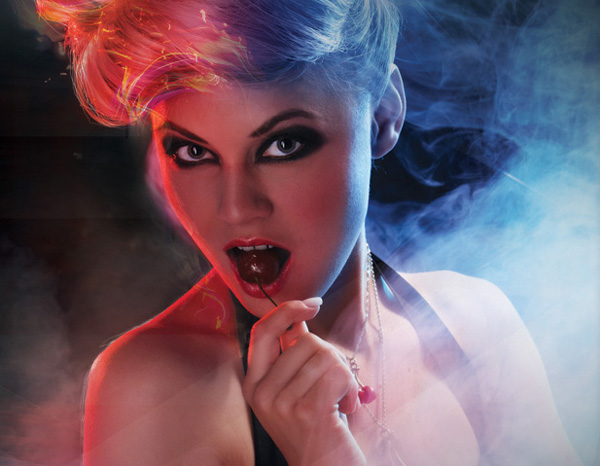
Design a Sexy, Enticing Poster Advert
Resources Used In This Tutorial
· Sexy Woman (Fotolia)
· Flaming Heart (Fotolia)
· Vector Rainbow Background (Fotolia)
· Smoke on Black Background (Fotolia)
· Smoke Image (Fotolia)
· Abstract Background Effect (Fotolia)
· Novecento Wide (Free Font)
· Raylight Brush Set (FanExtra)
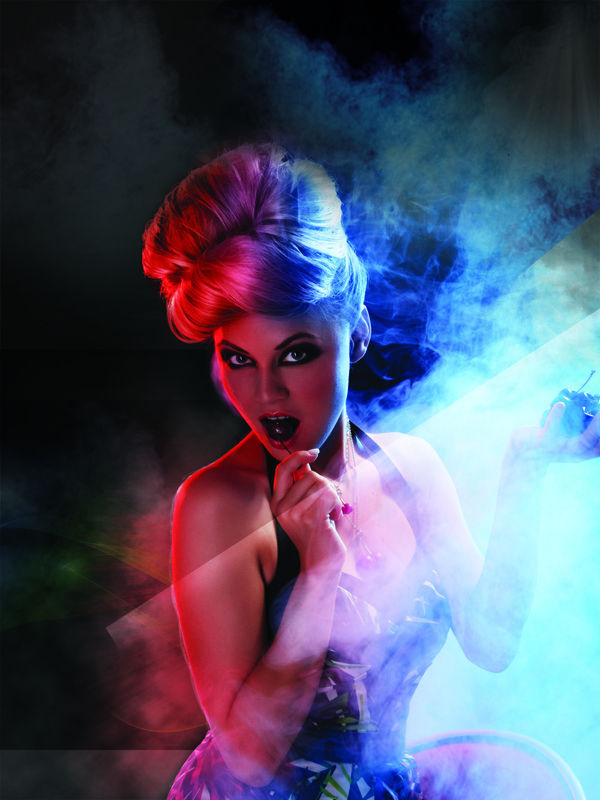
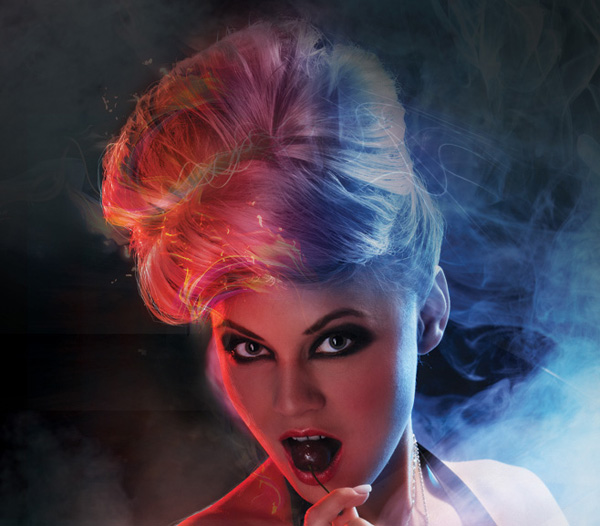
Final Image
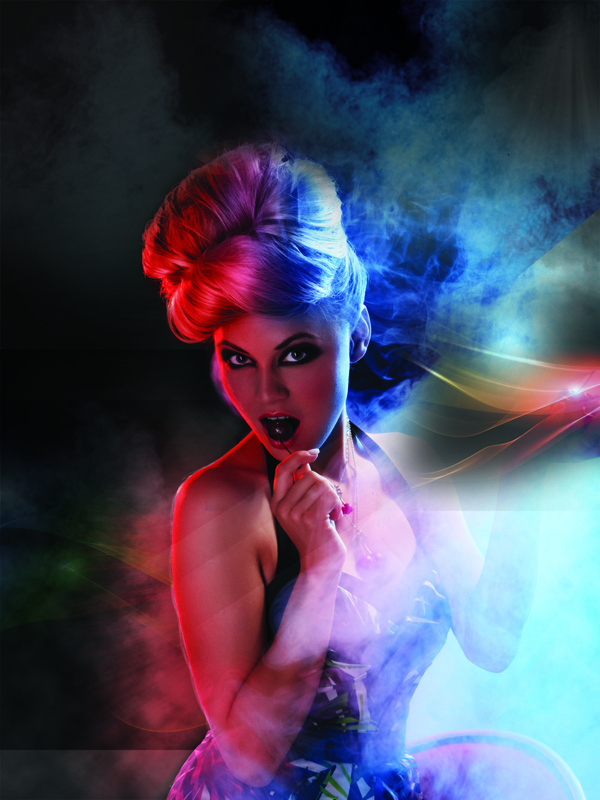
Here is a preview of the image that we are going to be creating:

IMPORTANT: Apologies, but due to working in a CMYK, print ready color profile for this piece, almost all of the images in this tutorial (apart from the final outcome image) are more faded than the actual piece. The colors should be closer to the final image displayed throughout, so please bear this in mind.
Step 1
Create a new document (1000X1350px). Ensure that you’re working with in a CMKY color profile, as this will make your document more print ready.
Create a new layer called ‘background’ and fill your canvas with black:

Select a large, soft paintbrush.
Create a new layer called ‘white light top left’. Apply a large, white brush mark in the very top left area of your canvas.
Then create a new layer called ‘red light top left’. Apply a red brush mark over this area, and change this layer’s blend mode to ‘overlay’:

Reduce the opacity of your ‘white light’ layer to 8% and the opacity of your ‘red light’ layer to 15%.
This will create an incredibly faint light effect in the top corner of your canvas:

Step 2
Create a new layer called ‘clouds left’.
Use your lasso tool (feather: 30px) to create a rough selection in the bottom left quarter of your canvas.
With this selection in place go to filter>render>clouds.

Reduce this layer’s opacity to 18%:

Paste in one of the smoke images from the resources section for this tutorial. Position it at the bottom of your canvas:

Now reduce this new smoke layer’s opacity to 12%. Also apply a levels adjustment layer (using a clipping mask) and the following settings:
Levels Adjustment Layer Settings:
62 / 1.00 / 243

Step 3
Copy your smoke layer and the levels adjustment layer connected to it.
Move your duplicated smoke up to the top area of your canvas and rename this layer ‘smoke top’.
The image below shows the duplicate smoke at 100% opacity, with the levels adjustment layer active:

Reduce this layer’s opacity to 15%, and apply a layer mask. Then use a soft, black paintbrush to mask off the central area of cloud:

Use a soft, low opacity paintbrush to apply some subtle white/blue highlights to the top of your canvas:

Step 4
Download the ‘raylight’ brush set from the resources section for this tutorial.
Apply a white ray of light on a new layer, pointing down from the top right corner of the canvas.

Reduce the opacity of this layer to 20% to make the lighting more subtle:

Step 5
Now it’s time to apply some further lighting.
Create a new layer called ‘raylight sides’. Apply a raylight brush using a light red paintbrush:

Now change this layer’s blend mode to ‘overlay’ and reduce it’s opacity to 55%:

Paste in the ‘rainbow’ image from the resources section for this tutorial, positioning it in the bottom left area of your canvas.
Use a layer mask to blend the top of the image into the background:
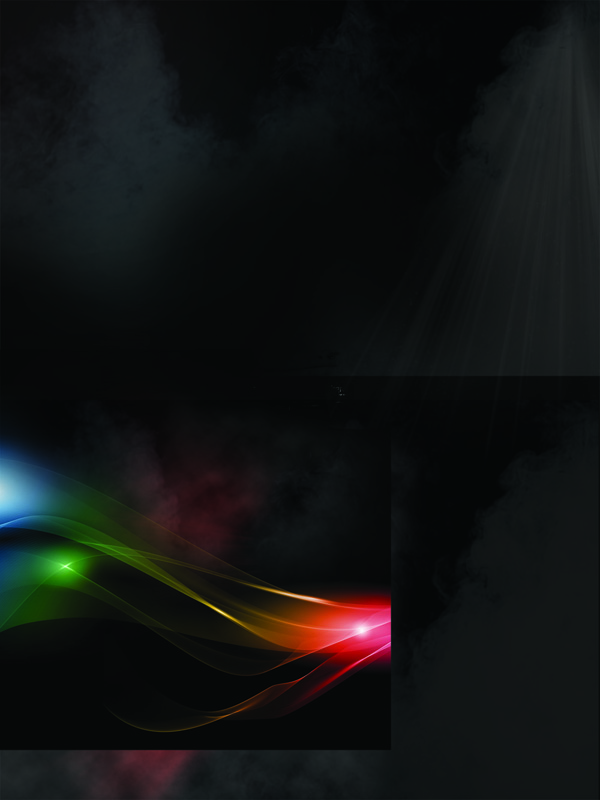
Change this layer’s blend mode to ‘overlay’ and reduce it’s opacity to around 50%:
Finally, create a new layer called ‘raylight (white)’ and apply several of the raylight brushes from your downloaded brush set, using a white paintbrush:

Change this layer’s blend mode to ‘overlay’ and reduce it’s opacity to around 40%

Step 6
Paste in the ‘sexy woman’ image from the resources section for this tutorial:

Now apply a layer mask and carefully use a soft, black paintbrush to mask off parts of the woman’s background:

Step 7
Let’s now look at how to create a cool sketchy edge down the side of the woman.
This is a nice visual detail to include, adding a handdrawn element to your digital work.
If you look at the image below you can see the sketchy lines down one side of your woman:

Let’s look at how to create this effect!
Start by copying your woman into a new document. Resize her to around 3-5 times her original size.
Then create a new layer called ‘sketchy lines’. Use a soft, 1px white paintbrush to sketch rough lines over the side over your woman. If you have a tablet you can do this much easier, but if you’re using a mouse then this is an effective technique.

Select your ‘sketchy lines’ layer and paste it back into your original document.
Resize the sketchy white lines to fit to the size of your woman. Because you’re making them 3-5 times smaller they will become less messy looking and more handdrawn looking. They should also fit well to the shape of your woman.

Now change your ‘sketchy lines’ layer’s blend mode to ‘overlay’ to make the effect more subtle:
Step 8
Paste one of the smoke images from the resources section for this tutorial into the top right part of your canvas.
Rotate it to look like the image below:

Reduce this layer’s opacity to around 60% and use a layer mask to mask off the edges, blending them smoothly into your main background:

Apply a levels and color balance adjustment layer to your new smoke layer (being sure to give each a clipping mask).
Levels Adjustment Layer Settings:
62 / 1.00 / 243
Color Balance Adjustment Layer Settings:
Highlights: -40 / 0 / +22
Midtones: -29 / 0 / +35
Shadows: -26 / 0 / +23

These adjustments should make your new area of smoke blend better with the surrounding smoke, making it more blue and sharp:

Step 9
Create a new layer called ‘gradient light effect’.
Use your linear gradient tool to create a simple white to transparent gradient like this:
Rotate this shape to make it more diagonal. Then change it’s blend mode to ‘overlay’ and reduce it’s opacity to 43%.
Duplicate this layer and create a couple more diagonal lighting effects.
Vary the opacity of each of these layers to make the lighting effect more random.

Ensure that the 3 light effect layers are placed in a single layer folder or group and then reduce this layer group’s opacity to 19%. This will make the entire light effect far more subtle:

Step 10
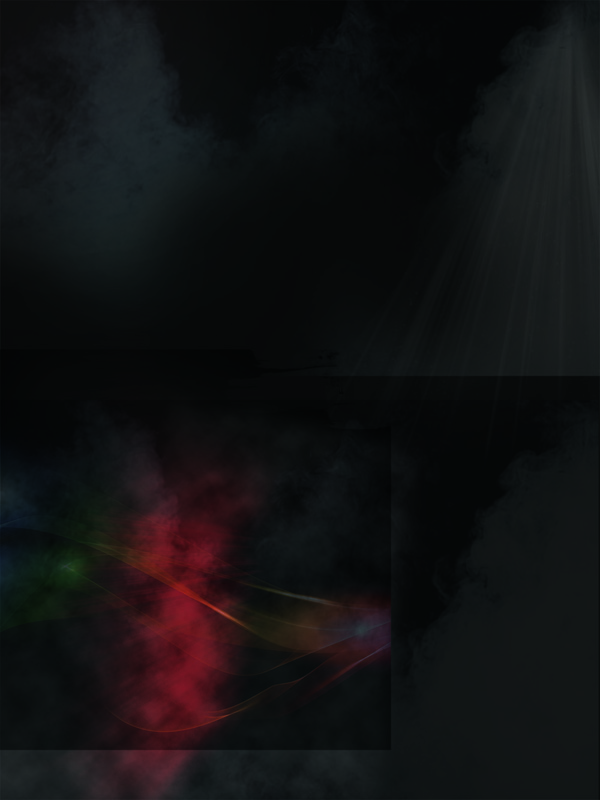
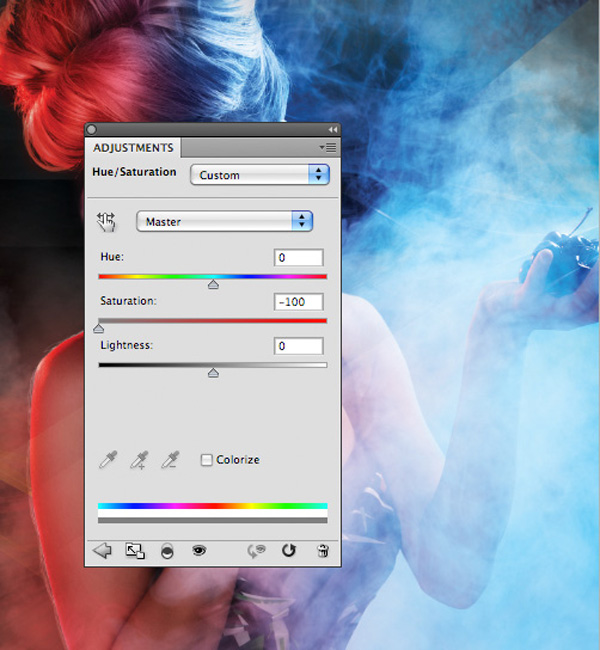
Paste in your rainbow background image from the resources section for this tutorial.
Position it over the woman’s hand/arm.

Now apply a layer mask and use a soft black paintbrush to mask off the edges of this rainbow image.
Reduce it’s opacity to 76%.
Finally, change it’s layer blend mode to ‘overlay’.
Also apply a hue/saturation adjustment layer (with clipping mask) and reduce it’s saturation to -100.
Step 11
Create a new layer called ‘bottom shadows’.
Use a large, soft black paintbrush to paint over the bottom/right side of your canvas, engulfing these areas in shadow:

Step 12
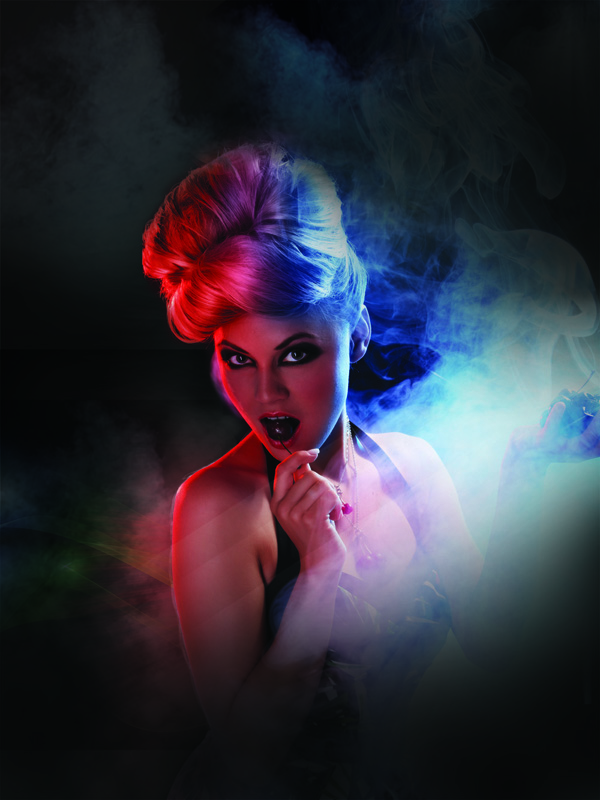
A little more smoke is needed in the top right part of the canvas.
Download the second smoke image from the resources section for this tutorial.
Paste it into your canvas and position it as shown:

Apply a layer mask and mask off the edges of this smoke area, blending it more smoothly into the background.

Reduce this layer’s opacity to 14%:
Step 13
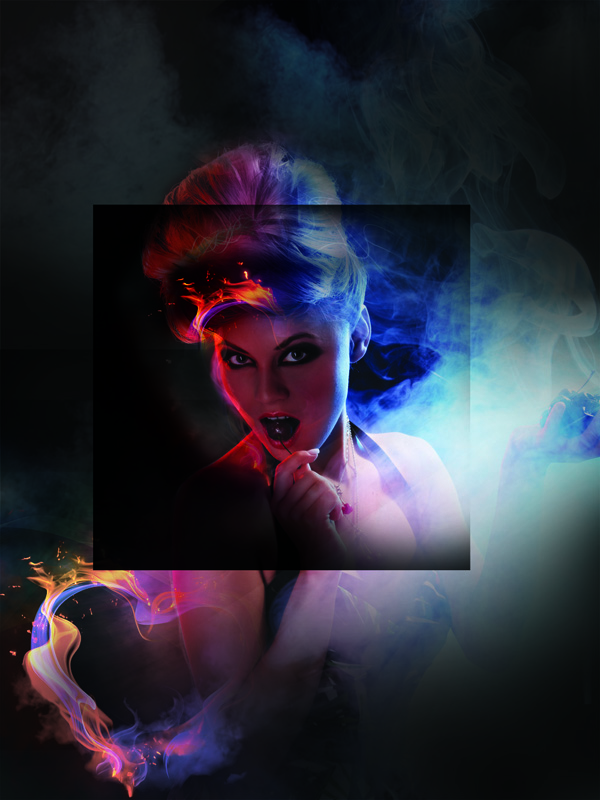
Download the ‘flaming heart’ image from the resources section for this tutorial.
Paste it into the bottom left of your canvas:

Change it’s layer blend mode to ‘screen’.
Apply a layer mask and use a soft black paintbrush to mask off the top right area of the heart:

Apply a levels adjustment layer (with clipping mask) in order to make the background of the heart more transparent and bring out the contrast of the fiery heart.
Levels Adjustment Layer Settings:
77 / 1.15 / 224

We want the fire of the heart to really ‘pop’ and be very intense. To achieve this, create a new layer called ‘white highlight heart’.
Set this layer’s blend mode to ‘overlay’ and then use a white paintbrush to brush over the top of the heart shape.
This should make the colors pop even more:

Step 14
Paste in the ‘abstract rainbow background’ image from the resources section for this tutorial.
Go to edit>transform>warp and warp it to curve round the shape of the woman’s head a little more:

Reduce this layer’s opacity to 50% and then use a layer mask to mask off all the edges of this area, just leaving a subtle lighting effect over the woman’s hair parting:

Step 15
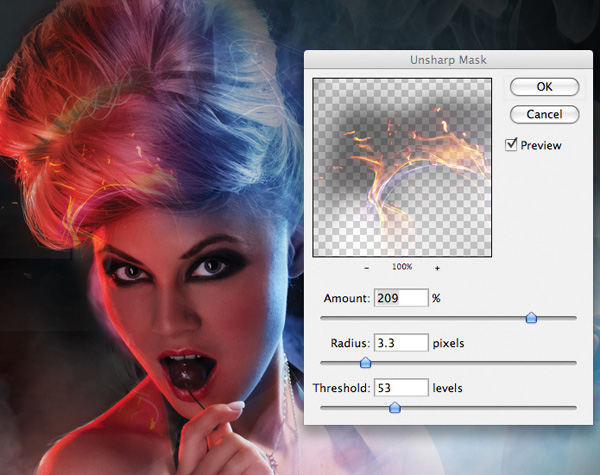
Paste in your flaming heart image again, this time positioning it over your woman’s face.

Apply a layer mask and use a soft black paintbrush to mask off most of the heart image, leaving just a small area of flame above the woman’s eye:
Change this layer’s blend mode to ‘screen’ and reduce it’s opacity to 69%.

Apply a levels adjustment layer (with clipping mask) to help hide the background of the flaming heart and give it more intensity.
Levels Adjustment Layer Settings:
77 / 1.15 / 224

The flaming heart area could do with being a little crisper.
To fix this, go to filter>convert for smart filters. Then go to filter>sharpen>unsharp mask.
Unsharp Mask Settings:
Amount: 209%
Radius: 3.3 pixels
Threshold: 53 levels
Step 16
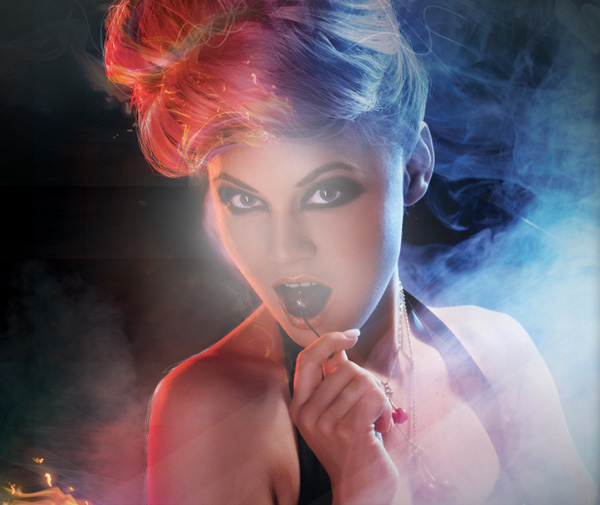
Use the techniques shown in Step 15 to apply several more areas of flame to the woman’s hair, building up a detailed lighting effect:
Step 17
Want want to draw even more attention to the woman’s striking face.
To achieve this create a new layer called ‘highlight over model’s face’.
Use a soft, low opacity paintbrush to paint over the woman’s face.
Change this layer’s blend mode to ‘overlay’ and reduce it’s opacity to 10%.

Step 18
The cherry in the woman’s mouth is currently looking too dark and we want it looking more red.
Create a new layer called ‘red cherry’.
Use a soft, red paintbrush to paint over the cherry shape:
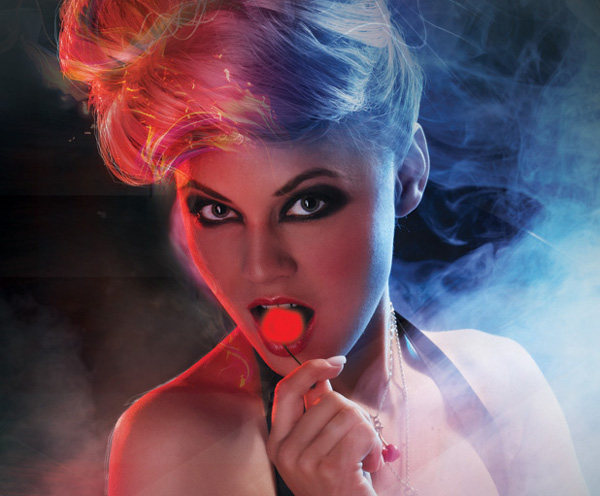
Change this layer’s opacity to around 30% and change it’s blend mode to ‘color’:
This will give your cherry a subtle red glow.
Use a white paintbrush to add further highlights to your cherry, making it stand out:

Step 19
Paste in your logo or header to the top of your canvas.

To make my logo stand out I isolated the text part of the logo and gave it an outer glow blending option:
Outer Glow Blending Option Settings:
Blend Mode: Screen
Opacity: 25%
Color: b8e5fa
Spread: 0%
Size: 30px


Step 20
Apply some text over your poster with details of your company or event.
Poster Text Font Settings:
Font Face: Novecento Wide
Styling: Bold
Kerning: -50
Color: ffffff

Step 21
Create a new layer called ‘dodge/burn’.
We’re going to dodge/burn our poster in a non-destructive way and bring out some of the intensity that we’re going for!
Go to edit>fill>50% gray to fill your canvas with 50% gray. Then change your layer’s blend mode to ‘dodge/burn’. This will hide your gray fill.
Use a soft, black paintbrush (10% opacity) to paint in shadows over your piece. Apply a soft, white paintbrush (10%) to paint in the highlights.
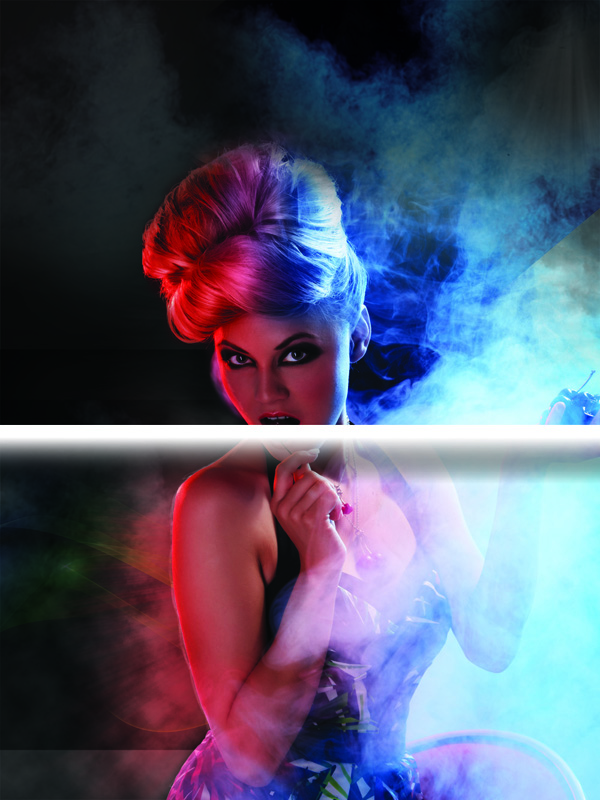
The image below shows the dodge/burn layer at ‘normal’ blend mode just so you can see my brush strokes:

And with the dodge/burn layer at ‘overlay’ blend mode:

Step 22
Create a new layer called ‘color highlights’.
Use a large, soft paintbrush to apply a variety of brush marks, using colors that compliment your overall pieces:

Change this layer’s blend mode to ‘overlay’ and reduce it’s opacity to 39%.

Step 23
To complete your piece apply a final levels adjustment layer (don’t give this adjustment layer a clipping mask).
Levels Adjustment Layer Settings:
9 / 0.94 / 235

And We’re Done!
You can view the final outcome below. I hope that you enjoyed this tutorial and would love to hear your feedback on the techniques and outcome.
Дата добавления: 2015-10-28; просмотров: 100 | Нарушение авторских прав
| <== предыдущая страница | | | следующая страница ==> |
| Типы силуэтов | | | Ouml;sterreich |